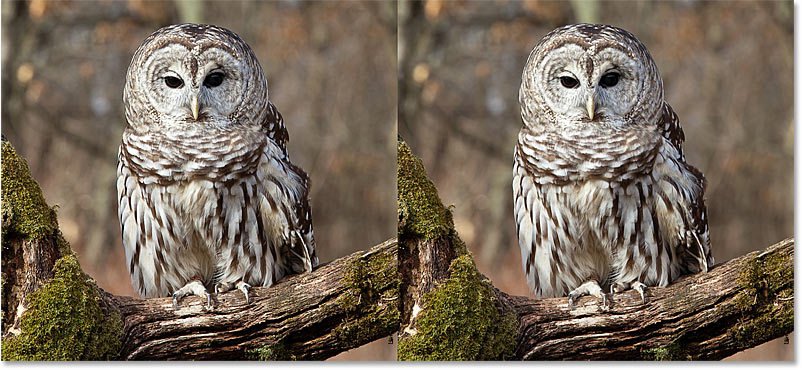
One of the most exciting and challenging issue in digital photography is the sharpening of images. This is the most complex issue since, no matter how good the shot maybe it will look “dole” or “artificial” if it isn’t sharpened properly. And while there are many ways to sharpen images, most do not work very well since these “filters” sharpen everything including unwanted areas, grain or noise. However, there is an approach that is called the “Two Pass” sharpening technique and that works for all pictures. It is much more demanding than pushing a key on your keyboard but the results are quite astounding.

This technique permits to, first (Pass 1), sharpen only parts of the image that need sharpening, leaving grainy and noisy areas intact and then apply a second pass to adjust for printing, hence sharpening mainly what needs to be sharpened.The idea is to isolate the hard edges in an image and sharpen those while leaving alone area that do not have edges and hence, in most circumstances do not need sharpening or less of it.
Caution : regardless of the technique you use, you should never sharpen an image before you change its size. As a matter of fact I recommend that sharpening should only be done after all manipulation are completed and you are ready to print.
Now for the technique: This technique is based on using Photoshop (regardless of the version).
1) From a one layer background image (make sure that you have only one layer and that your image is the background) make a duplicate. (command sequence: Image + Duplicate).
The idea is to isolate the hard edges in an image and sharpen those while leaving alone area that do not have edges and hence, in most circumstances do not need sharpening or less of it.
Caution: regardless of the technique you use, you should never sharpen an image before you change its size. As a matter of fact I recommend that sharpening should only be done after all manipulation are completed and you are ready to print.
Now for the technique: This technique is based on using Photoshop (regardless of the version).

2) Convert the duplicated image to gray scale (some experts suggest converting only one channel but I convert directly from the RGB composite and so far have been happy with the results). An option to flatten or not will be offered and I found no noticeable difference so flatten would be my choice. (command sequence: Image + Mode + Gray scale)
 |
3) Once the image is converted, isolate the edges. (command sequence: Filter + Stylize + Find Edges)
Note that gray scale image will have to be 8 bits or the Find Edges will not be available.
4) Once the edges have been isolated, run a Gaussian Blur to make sure that the edges are not too sharp. (command sequence: Filter + Blur + Gaussian Blur)
You will have to experiment but I set mine at anywhere between 2.2 and 5.0 depending on the image.
 |
5) Once this is done, invert the image (command sequence: Image + Adjustments + Invert)
 |
6) Then narrow the level of the inverted image in order to limit the field to only what needs to be sharpened (this will end up with a very high contrast between whites (foreground) and black (background) and nothing much in between. (command sequence: Image + Adjustment + Level)
 |
7) Go back to the original image and load the adjusted duplicate image. (command: Select + Load Selection) The delimitation of the edges that were identified earlier will then load over the original image and will appear as a blinking doted line.
You can hide the doted line by using the Control-H key (IBM – For MAC substitute Control-H key by Command-H key). The lines can be revealed again by using the same key combination of keys. I personally use the blinking lines to identify the areas that will be sharpen, zoom in on the most relevant one, but then turn it off as I find it too distracting.
 |
8) Enlarge your image to no less than 50% (ideally 66 to 100%) and un-sharpen the areas that are highlighted (command: Filter + Sharpen + Un-sharp Mask). If, like most of us, you have a smaller monitor (17’ or less – I have mine set at 1152×864) you will have to check various areas of the image to make sure that the sharpening is done evenly and that the areas sharpened are “sharp” but not distorted or exaggerated.
The amount of un-sharpening varies widely between images and there is no good number I can give you. A rule of thumb that I developed is to set my Radius between .8 and 1.5 then set my amount and adjust the Radius depending on halo and other factor while using the Threshold to limit some areas.
This work with images with heavy foliage, trees, etc. but is not enough for images with less detail. Finding the right amount for your pictures takes some practice.
As you will with the example below, I am quite conservative when it comes to un-sharpen.
9) Finally, deselect (command sequence: Select – Deselect) and saved as sharpened image if need be.
10) Review your entire image (ideally at 100% size) and sharpen (2cd Pass) according to whatever use you may have (print, Internet, etc.)
Next and below, I’ve put samples of the picture I’ve been using to show the result. I’d like to particularly draw your attention to the dramatic increase in noise in the sky when using the Adobe Photoshop provided filter (More Sharpen) as compare to the clean result obtained using the 2 Pass approach. Now compare the sharpening of the tree before and after sharpening with the 2 pass and the Adobe More Sharpen.
 |
You’ll be the judge!!!!
 |  |
 |  |
That’s about it, so let me know how if it worked for you. Also if you have examples of what you did or did not do to improve your print or whatever you do in photography or imaging let me know since I’d like to post and share new ideas with others.
Additionally, I will give away tips on a regular basis on the site, so if you’d like to sign-up to receive these and more tips do so below. (As usual, your e-mail address and any information given on this site will never be sold, leased, rented or exchanged with anyone). To register e-mail with word ‘REGISTER FOR TIPS” in the subject line at:
Source: Digitalphotoshack.com


